Do you find it hard to remove old paint or finish from wood surfaces? We have the right solution that can help you. Our new technique lets you strip wood coverings quickly and with less work, which helps save time and energy. We have developed a special method for wood stripping that aims to be straightforward and free from complications. Now, you no longer need to spend many exhausting hours trying to scrape off old paint or varnish. Our method is quick, effective, and produces fantastic results every time.
If you like doing things yourself or if you work with wood for your job, our method works well for all types of projects, no matter their size. We know that stripping wood can be annoying, so we have created a simple way to help make this task less difficult for you.
Wave farewell to tired arms and striped wood that is not looking good – our method will make your surfaces appear new and set for a fresh coating quickly. Attempt it and discover the simplest method to remove layers from wood on your own. It’s time to make wood stripping a breeze!
Why Strip Wood?
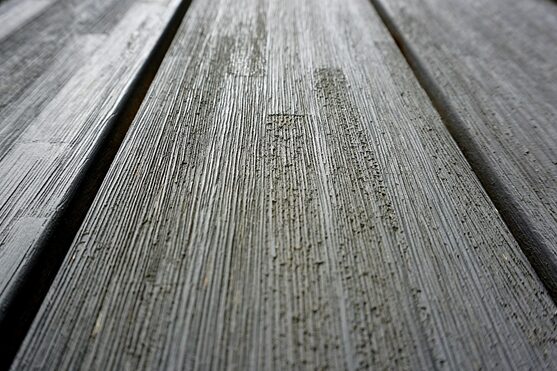
Stripping wood is a very important part when working on projects to make old furniture look good again. As time passes, pieces of wood get covered with old paint or different kinds of protective coverings which hide how beautiful the wood is and also cause problems when trying to put new finishes on them. When you strip the wood, it takes off the old layers so that you can begin fresh and get the result you want.
Additionally, stripping wood is important for bringing back its original color and texture that might be hidden due to many years of various coatings. If you want to make a piece of furniture look new, fix up an ancient door, or just revive your wooden floor, taking off the previous finish on the wood is essential before starting if you aim for a high-standard result.
Different Methods of Wood Stripping
There are several methods commonly used for wood stripping, each with its advantages and disadvantages. The method you choose will depend on factors such as the type and condition of the wood, the type of finish to be removed, and your personal preferences. Here are some of the most common methods:
- Chemical Stripping: This method involves the use of chemical strippers to break down the old finish, making it easier to remove. Chemical strippers typically come in liquid or gel form and are applied to the wood surface. After a certain period, the softened finish can be scraped away with a putty knife or similar tool.
- Heat Stripping: Heat stripping, also known as heat gun stripping, involves using a heat gun to soften and loosen the old finish, making it easier to scrape away. This method is particularly effective for removing paint or varnish from intricate or delicate woodwork, as the heat can be directed precisely where needed.
- Mechanical Stripping: Mechanical stripping methods involve using abrasive tools to physically remove the old finish. This can be done through sanding, either by hand or with a power sander, or by using a wire brush or scraper to scrape away the finish.
The Easiest Way to Strip Wood
Every method mentioned before has good points, but we have created a special way that takes the important parts of chemical, heat, and mechanical stripping to make it simpler to strip wood. This technique works very well and reduces how much time and effort you need to get great outcomes.
Our method uses a two-stage process: first, we make the old layer soft with a special liquid made for stripping, and then we take it off by using mild physical movements. This way is fast and does not require strong chemicals or too much sanding.
Tools and Materials Needed for Easy Wood Stripping
Before you begin the wood stripping process, it’s essential to gather the necessary tools and materials. Having everything prepared will ensure a smooth and efficient stripping experience. Here are the items you’ll need:
- Stripping Solution: Look for a high-quality stripping solution designed specifically for wood surfaces. Avoid generic or all-purpose strippers, as they may not be as effective.
- Safety Gear: Protect yourself by wearing gloves, safety glasses, and a respirator mask to prevent exposure to potentially harmful chemicals or dust.
- Brushes: You’ll need both a stiff-bristle brush and a soft-bristle brush. The stiff brush is used to apply the stripping solution, while the soft brush is used for the mechanical stripping process.
- Scraper: A putty knife or paint scraper will come in handy for removing the softened finish.
- Clean Rags: Have plenty of clean rags on hand for wiping away the stripping solution and cleaning the wood surface.
- Protective Coverings: Depending on the size and location of the project, you may need plastic sheeting or drop cloths to protect surrounding areas from any potential drips or spills.
Step-by-Step Guide to Wood Stripping
Now that you have all the necessary tools and materials, it’s time to get started with the wood stripping process. Follow the step-by-step guide below for easy and effective results:
- Prepare the Work Area: Start by laying down protective coverings to prevent any damage to surrounding surfaces. Ensure good ventilation in the area by opening windows or using fans.
- Apply the Stripping Solution: Using the stiff-bristle brush, apply a liberal amount of the stripping solution to the wood surface, ensuring complete coverage. Allow the solution to sit for the recommended time specified on the product label.
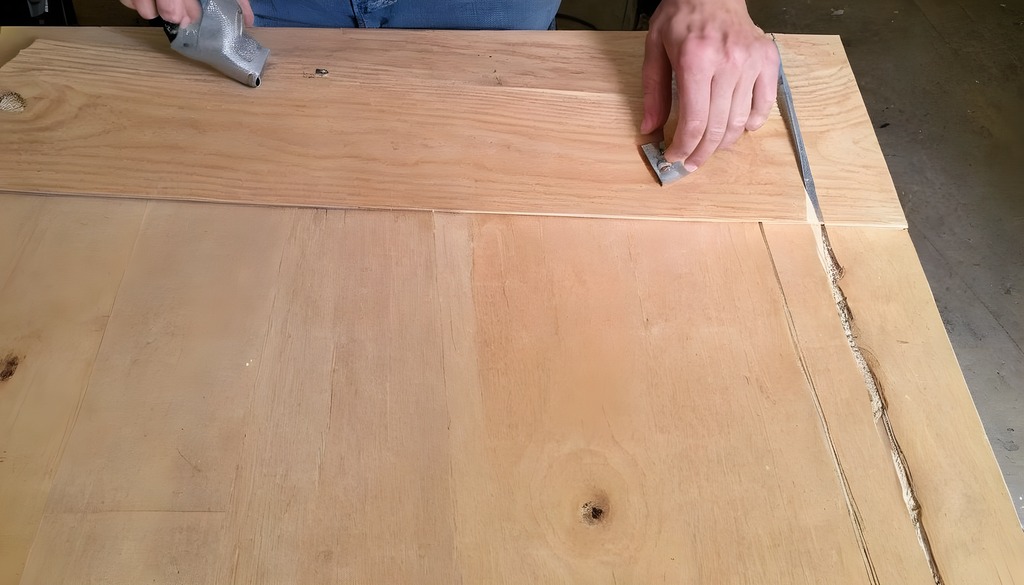
- Scrape Away the Softened Finish: Once the stripping solution has had time to work, use a scraper to gently scrape away the softened finish. Be careful not to apply too much pressure, as this can damage the wood. Wipe away any residue with a clean rag.
- Mechanical Stripping: After removing the bulk of the softened finish, switch to the soft-bristle brush and use it to gently scrub the wood surface. This mechanical action helps to remove any remaining traces of the old finish and reveal the wood’s natural beauty. Again, wipe away any residue with a clean rag.
- Clean and Neutralize: Once the wood surface is stripped, use a clean rag and warm water to thoroughly clean the wood and remove any remaining stripping solution. If the product used requires neutralization, follow the instructions provided.
- Inspect and Repeat if Necessary: After the wood has dried, inspect the surface for any missed areas or stubborn spots of old finish. If necessary, repeat the process in those specific areas until the wood is completely stripped.
Tips and Tricks for Successful Wood Stripping
While our method simplifies the wood stripping process, here are some additional tips and tricks to ensure successful results:
- Test in an inconspicuous area: Before applying the stripping solution to the entire wood surface, test it in a small, inconspicuous area to ensure compatibility and to gauge the required stripping time.
- Work in sections: Instead of tackling the entire wood surface at once, work in manageable sections. This allows for better control and ensures that no area is overlooked.
- Be patient: Let the stripping solution sit for the recommended time. Rushing the process may result in incomplete stripping or damage to the wood.
- Use gentle pressure: When scraping or brushing the wood surface, apply gentle pressure to avoid gouging or scratching the wood.
- Dispose of waste properly: Follow local regulations when disposing of used stripping solution, old finish, and other waste materials. Do not pour them down drains or dispose of them in regular trash.
Common Mistakes to Avoid When Stripping Wood
While our method makes wood stripping easier, it’s essential to avoid common mistakes that can hinder your progress. Here are some mistakes to watch out for:
- Using the wrong stripping solution: Make sure you choose a stripping solution specifically formulated for wood surfaces. Using the wrong product can result in poor stripping performance or damage to the wood.
- Skipping safety precautions: Always wear the appropriate safety gear, including gloves, safety glasses, and a respirator mask. Chemical strippers and dust from sanding can be harmful if not properly protected against.
- Applying too much pressure: Apply gentle, even pressure when scraping or brushing the wood surface. Excessive force can damage the wood or leave behind unsightly marks.
- Not allowing enough stripping time: Follow the recommended stripping time specified on the product label. Rushing the process can lead to incomplete stripping and the need for additional work.
- Working in unsuitable conditions: Ensure proper ventilation when working with stripping solutions or sanding dust. Avoid working in extreme temperatures or high humidity, as these conditions can affect the performance of the stripping process.
Safety Precautions for Wood Stripping
Wood stripping involves working with potentially hazardous chemicals and tools, so it’s crucial to prioritize safety. Here are some safety precautions to keep in mind:
- Ventilation: Work in a well-ventilated area to minimize exposure to fumes or dust. Open windows or use fans to improve air circulation.
- Protective Gear: Wear gloves, safety glasses, and a respirator mask to protect against chemical exposure and airborne particles.
- Follow Instructions: Read and follow the instructions provided by the manufacturer of the stripping solution and any other products used during the process.
- Proper Disposal: Dispose of used stripping solution, old finish, and other waste materials according to local regulations. Avoid pouring them down drains or disposing of them in regular trash.
- Keep Children and Pets Away: Ensure that children and pets are kept away from the work area to prevent accidental exposure to chemicals or injuries from tools.
Conclusion and Final Thoughts
Stripping wood is not a scary or hard job. With our new way, you can take off these finishes quickly and with less work. When you use our guide that has steps one by one, and the tools with materials we say to use, also not forgetting safe ways to do things, your work will look like it was done by a professional always.
Remember to have patience and proceed with small parts at a time, letting the stripping solution act before carefully taking off the loosened finish. Steer clear of usual errors like choosing an incorrect stripper, putting on too much force, or neglecting safety measures.
When you choose the simplest method for stripping wood, it lets you reveal the original charm of your wooden items such as furniture and floors. Why delay then? Bid farewell to arm discomfort and welcome the sight of perfectly stripped wood. Try our technique and simplify the process of stripping wood!