
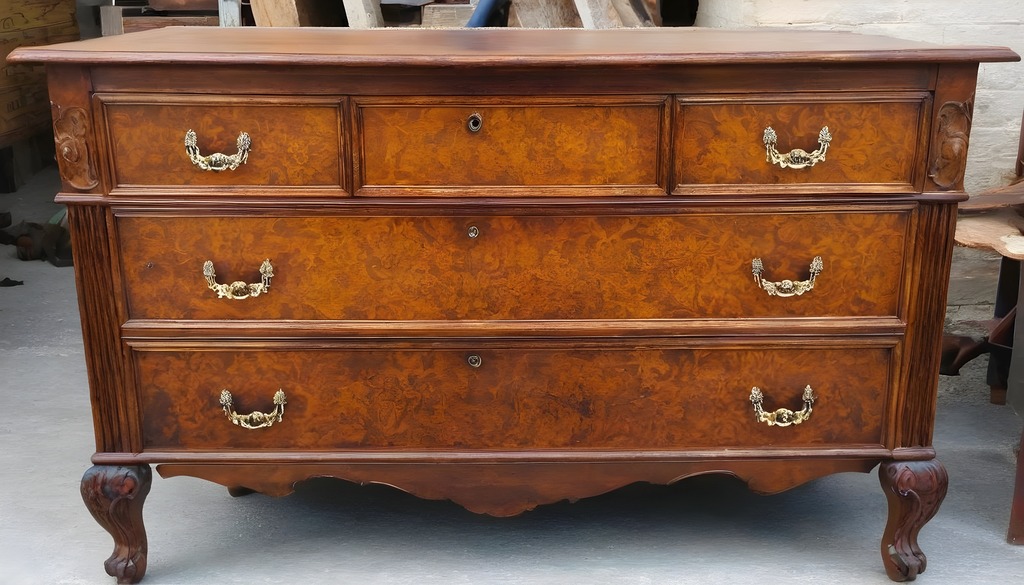
Antique wooden furniture has a unique elegance and charm that is hard to find in modern pieces. However, after years of use, these prized possessions may lose their shine and develop unsightly dents and scratches. But don’t worry! By using the right techniques and products, you can restore your antique furniture to its former glory. This comprehensive guide will help you refinish and restore your antique furniture, so you can update your beloved pieces while keeping their original charm intact.
1. The Art of Cleaning Antique Furniture
Before embarking on any restoration project, it’s crucial to give your antique furniture a thorough cleaning. Over the years, wood furniture accumulates dirt, oil, and grime, which can dull its shine and detract from its beauty. To restore the original finish, start by carefully cleaning the surface.
1.1 Soap and Water Solution
One of the easiest and safest ways to clean antique furniture is by using a gentle soap and water solution. For this purpose, consider using liquid Ivory dish soap, known for removing layers of dirt and grime without damaging the wood. Mix the soap with water and use a soft cloth or sponge to gently scrub the surface, paying special attention to intricate carvings and moldings. Rinse with clean water and dry thoroughly.
1.2 Sanding Away Blemishes
Sanding can be an effective solution for furniture with stubborn stains or blemishes. Using varying grit sandpaper or a sanding block, carefully sand the affected areas in the direction of the wood grain. This process will remove any surface imperfections and prepare the wood for refinishing. Remember to wear protective gloves and a mask to prevent inhaling dust particles.
2. Concealing Scratches and Imperfections
While some scratches on antique furniture add character and tell a story, others may be unsightly and diminish its appeal. Thankfully, there are several techniques you can employ to disguise these imperfections and restore the furniture’s original beauty.
2.1 Wood Polish and Beeswax
For minor scratches, applying wood polish can help restore the shine and minimize their appearance. After polishing, seal the scratches with a bit of similarly colored beeswax or furniture wax. Gently rub the wax over the scratch, using a soft cloth or your fingertips. This technique will help blend the scratch with the surrounding wood and create a seamless finish.
2.2 Touch-Up Pens and Stains
To tackle more noticeable scratches, consider using touch-up pens specifically designed for wood furniture. These pens come in various colors, allowing you to match the exact shade of your furniture. Apply the pen to the scratched area, following the manufacturer’s instructions, and blend it with the surrounding wood. Finish off by applying a layer of lacquer or polyurethane to protect the repaired surface.
2.3 Natural Remedies
For those looking for a more natural approach, several household items can help hide superficial scratches. Coffee grounds, crayons, and even cooking oil can be used to darken or stain the scratched area, camouflaging it within the wood’s natural grain. These methods, although not as precise as professional products, can be effective in certain situations and add a touch of DIY charm to your restoration project.
3. Stripping and Refinishing
For antique furniture that has suffered extensive damage or has an outdated finish, stripping, and refinishing may be necessary. This process involves removing the old finish and applying a new one, transforming the furniture into a modernized version of its former self. However, caution must be exercised when choosing this path, as it requires skill and meticulous attention to detail.
3.1 Using Strippers
When stripping antique furniture, using the appropriate products and techniques is crucial to avoid damaging the wood. Strippers are chemical solutions designed to dissolve the existing finish, allowing it to be easily removed. Before applying any stripper, it’s essential to test it on a small, inconspicuous area to ensure compatibility with the wood and to assess the desired outcome. Follow the manufacturer’s instructions carefully, wear protective clothing, and work in a well-ventilated area.
3.2 Sanding and Staining
After stripping off the old finish, sanding the wood surface smooths out any imperfections and prepares it for staining or painting. Begin with coarse-grit sandpaper and gradually move to finer grits to achieve a polished finish. Once the surface is smooth, apply the preferred stain or paint using long, even strokes, following the wood grain. Multiple coats may be necessary to achieve the desired depth of color. Finish with a final coat of protective varnish or wax to enhance durability and add a glossy sheen.
4. Repairing and Restoring Veneer
Veneer is a thin layer of wood applied to furniture surfaces to give the appearance of solid wood. Over time, a veneer can become loose, cracked, or damaged. Restoring the veneer requires careful attention and specialized techniques to ensure a seamless repair.
4.1 Reattaching Loose Veneer
To repair loose veneer, first, remove any loose or damaged pieces. Apply wood glue to the back of the veneer and carefully press it back into place. Use clamps or weights to hold the veneer in position until the glue dries. Once dry, sand the repaired area lightly and finish with the desired stain or paint.
4.2 Repairing Cracks and Chips
For minor cracks or chips in the veneer, carefully apply wood filler or epoxy using a putty knife. Smooth out the surface and allow it to dry completely. Once dry, sand the area to achieve a seamless finish. For larger cracks or damaged sections, it may be necessary to replace the entire veneer sheet. Consult with a professional restorer or a skilled furniture repair specialist for the best results.
5. Rejuvenating Hardware and Accessories
Antique furniture often features unique hardware and accessories that add to its charm. Restoring these elements can significantly enhance the overall appearance of the piece.
5.1 Cleaning and Polishing Hardware
To revitalize tarnished or dull hardware, remove it from the furniture and clean it thoroughly. Use a mild metal cleaner or a mixture of vinegar and water to remove dirt and grime. For heavily tarnished pieces, consider using a commercial metal polish. Once clean, apply a protective coat of lacquer or wax to prevent future tarnishing.
5.2 Replacing Missing or Damaged Hardware
If the original hardware is missing or damaged beyond repair, consider replacing it with similar vintage pieces or replicas. Pay attention to the style, size, and finish to ensure a cohesive look. Antique shops, online marketplaces, and specialty hardware stores are excellent sources for finding suitable replacements.
6. Preserving the Patina
The patina, or the natural aging of wood, is one of the defining characteristics of antique furniture. Preserving the patina during the restoration process is essential to maintain the authenticity and value of the piece.
6.1 Gentle Cleaning and Maintenance
When cleaning antique furniture, it’s essential to use gentle methods that minimize disruption to the original patina. Avoid harsh chemicals or abrasive cleaners that can strip away natural aging. Instead, opt for mild soap and water solutions or specialized wood cleaners designed for delicate surfaces.
6.2 Consider Professional Restoration
For valuable or historically significant antique furniture, it’s advisable to consult with a professional restorer. These experts possess the knowledge and experience to preserve the patina while restoring the piece to its former glory. Professional restoration ensures that the original integrity and value of the furniture are maintained.
7. Caring for Restored Antique Furniture
Once you’ve successfully restored your antique furniture, proper care and maintenance are essential to ensure its longevity and continued beauty.
7.1 Regular Dusting and Cleaning
Dust your restored antique furniture regularly using a soft, lint-free cloth or a feather duster. Avoid using abrasive materials or harsh chemicals that can damage the finish or patina. For occasional deep cleaning, follow the gentle cleaning techniques mentioned earlier.
7.2 Avoid Direct Sunlight and Extreme Conditions
To prevent fading and warping, avoid placing restored antique furniture in direct sunlight or areas with extreme temperature and humidity fluctuations. Exposure to these conditions can accelerate the deterioration of wood and compromise the restoration work.
7.3 Periodic Maintenance and Touch-ups
Over time, restored antique furniture may require minor touch-ups to maintain its appearance. Periodically inspect the piece for any signs of wear or damage and address them promptly. Applying wax or polishing can help preserve the shine and protect the wood.
8. Embracing the Beauty of Restored Antique Furniture
Restoring antique furniture is not only a way to modernize cherished pieces but also an opportunity to honor their history and craftsmanship. With the right techniques and a touch of creativity, you can unleash the hidden charm of your antique furniture and breathe new life into your living spaces.
So go ahead, embark on your restoration journey, and let the beauty of antique furniture shine once more!
“Restoring antique furniture is like a journey through time, where the beauty of the past meets the creativity of the present.”
Remember, antique furniture restoration requires patience, skill, and attention to detail. If you’re unsure about any aspect of the process or feel overwhelmed, it’s always best to consult with a professional restorer who can guide you through the journey.
So, roll up your sleeves, put on your creative hat, and embark on the adventure of restoring antique furniture to its former glory. The rewards will be immeasurable, both in terms of the beauty you’ll unleash and the stories these cherished pieces will continue to tell for generations to come.
Now, let’s turn back the hands of time and elevate the charm of your antique furniture!