
Are you looking to give your wood furniture a fresh new look? Want to get rid of those stubborn stains and color inconsistencies? Bleaching wood furniture may be the solution you’ve been searching for. We’ll show you how to bleach your wood furniture for a lighter color in this article.
Why Bleach Wood Furniture?
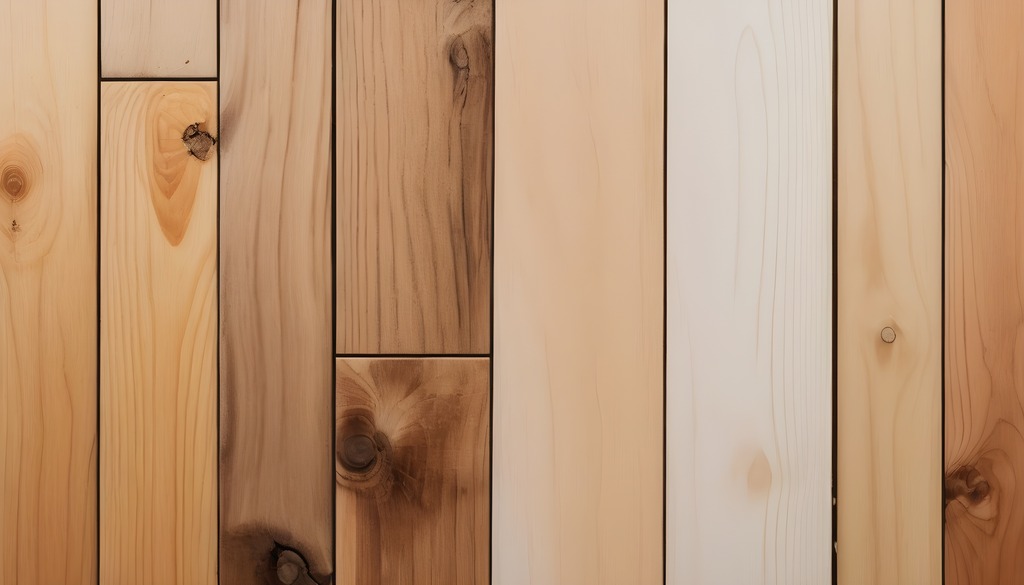
Bleaching wood furniture is a good method for bringing back its first beauty and also gives many options to make it unique. If you wish to make the color of your furniture lighter or get it ready for a fresh stain or coat of paint, using bleach can assist in getting the look you want.
When you find a piece of wooden furniture that has many deep stains or the color is not even because it got old or was finished before, using bleach can be good. It helps take away these marks and gives you a clear surface to start with for the finish you want. You should know that if you bleach wood, it will become lighter than its natural color. If you like the wood how it is now, maybe bleaching isn’t a good idea for you.
Types of Wood Bleach
Before you start the bleaching process, it’s important to understand the different types of wood bleach available. There are two main types: chlorine bleach and oxalic acid bleach.
- Chlorine Bleach: Chlorine bleach is often used to clean houses, and it can make wood lighter. However using chlorine bleach on wood might damage the fibers, making them weak or causing them to break easily after a while. It is generally not recommended for use on fine or antique furniture.
- Oxalic Acid Bleach: Oxalic acid bleach is a secure and better choice for making wood furniture lighter in color. It works well to get rid of stains from water, rust, or dark marks that come from mold or mildew. Oxalic acid bleach comes as crystals and you must dissolve it in water before using.
Preparing the Wood for Bleaching
Before you start bleaching your wood furniture, you need to ensure that it is properly prepared. Follow these steps to prepare the wood:
- Clean the Surface: Begin by making the furniture’s surface clean, taking away all dirt, dust, or little pieces that shouldn’t be there. A soft cloth or brush should be used to carefully clean the surface. For any tough stains, you can clean them using a gentle soap mixture.
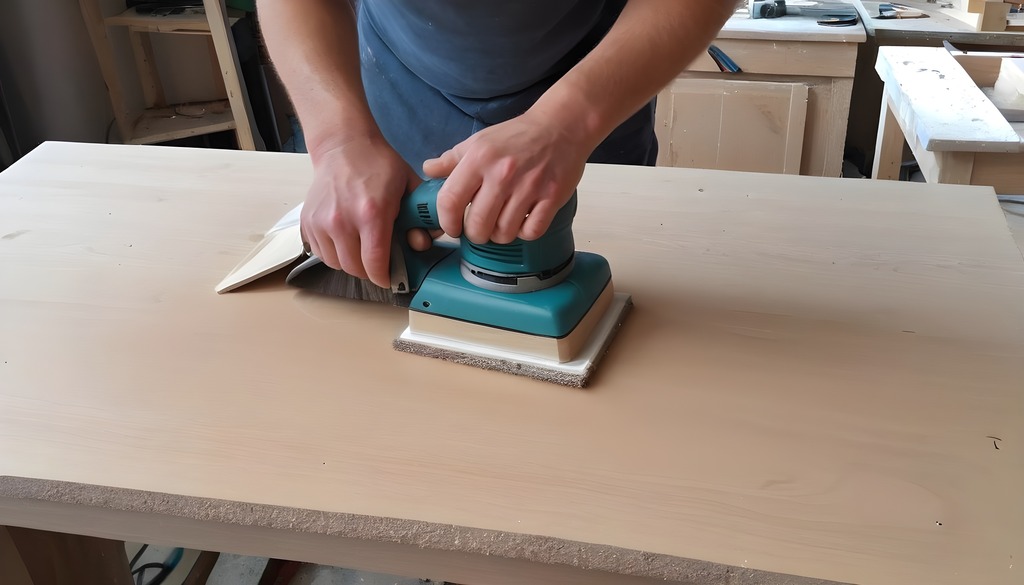
- Sand the Surface: Prepare the surface by lightly sanding it with fine-grit paper after cleaning it so that the bleach can soak into the wood uniformly. Sand in the direction of the wood grain to avoid scratches or surface damage.
- Guard Nearby Spaces: Bleach is a harsh chemical, so it’s essential to shield nearby places from possible harm. Lay plastic covers or drop cloths over the floor and close furniture to stop any spills or splashes by accident.
Applying the Wood Bleach

Now that the wood is properly prepared, it’s time to apply the bleach. Follow these steps for a successful application:
- Wear Protective Gear: Before beginning, please put on safety equipment like gloves, protective glasses, and a face mask. Bleach might be dangerous if it gets on your skin or in your eyes, and breathing the gases can also pose risks.
- Prepare the Bleach Mixture: Check the instructions on your bleach packaging and mix accordingly. If it’s oxalic acid bleach, you need to dissolve these crystals in warm water as per the suggested proportion.
- Apply the Bleach: Put the bleach on the wood by using a brush, sponge, or cloth and move it along the lines of the wood for an even look. Keep the bleach on the wood for the time suggested, typically 15-20 minutes.
- Check the Color: Once enough time has passed, examine the wood’s shade. Should it have attained the lightness you wish for, move on to subsequent action. For a lighter shade, keep the bleach on for more time but be careful not to put too much as it might damage the wood.
- Rinse the Wood: After you get the color you want on the wood, wash it well with pure water to take away any remaining bleach. A sponge or a wet cloth can be used to clean off the bleach from the surface. Ensure that all bleach is completely wiped away so there’s no chance of harming the wooden surfaces.
Neutralizing and Cleaning the Wood
After rinsing the wood, it is important to neutralize and clean the surface to prepare it for the next steps. Follow these steps:
- Neutralize the Bleach: To stop the bleach from working, you can make a mix of water and vinegar in equal amounts. Put this mixture on the wood with a sponge or cloth. It aids in maintaining the pH balance and stops the wood from getting lighter.
- Let the Wood Dry: Give time for the wood to become dry. Before you move on with further steps, make sure it is fully dried which might take from several hours up to an entire day and this depends on how much moisture is in the air and if there’s good airflow in your space. Ensure that the wood is entirely dry to prevent any problems when you are doing the finishing work.
- Clean the Surface: After the wood has dried, clean the surface one more time to take away any left-behind residue or small pieces. With a fresh cloth or brush, softly sweep off any extra dust or bits that are still there. This will ensure a smooth and even finish on the bleached wood.
Sanding and Finishing the Bleached Wood
After the wood is neutralized and cleaned, it’s time to sand and finish the bleached surface. Follow these steps for a professional-looking finish:
- Sand the Surface: Begin by gently sanding the wooden surface using fine-grit sandpaper to smooth out any rough areas or raised fibers resulting from the bleaching. Rub the sandpaper along the lines of the wood to get a surface that is smooth and flat.
- Apply a Wood Conditioner: Before you put any stain or finish, it’s good to use a wood conditioner on the surface first. It makes sure that the wood takes in the stain or finish better and stops uneven spots from forming. Follow the instructions on the wood conditioner product for the best results.
- Stain or Finish the Wood: After the wood conditioner has dried, you may go ahead and put on the stain or finish that you like. Pick one that matches the style you want to achieve and use it according to what is written in the instructions for how to apply it. Put on the stain or finish in consistent layers, making sure each layer dries completely before you add another one.
- Seal the Wood: After the wood stain or finish has dried, it is crucial to apply a sealant. This step will safeguard the wood against water and daily use impacts. You should put on a clear sealant or varnish by following what the product guide says. This will provide a protective layer and enhance the durability of the wood furniture.
Tips for Successful Wood Bleaching
To ensure a successful wood bleaching process, here are some valuable tips to keep in mind:
- Test on a Small Area: Try out the bleach on a little, hidden part of the furniture first. Doing this lets you see how the wood reacts to the bleach and makes sure it looks like what you want for your whole furniture piece.
- Work in a Well-Ventilated Area: When you bleach wood furniture, it is necessary to do this task where there is good air circulation. Dangerous gases can come out during the process and breathing them in might be bad for your health. So make sure that the space has enough ventilation that a fan is used, or that windows are opened to let fresh air move through efficiently. This will help minimize the exposure to fumes and create a safer working environment.
- Follow Safety Precautions: Make sure to use safety equipment like gloves, eye protection, and a face mask when you handle bleach. Carefully read the directions on the bleach package so that you can prevent accidents or harm.
- Take Your Time: Be patient during the bleaching process as it needs careful attention and thoroughness. Make sure to perform each stage properly and give enough time for the wood to fully dry before moving on to the next step. Rushing the process may lead to subpar results.
Common Mistakes to Avoid When Bleaching Wood Furniture
While bleaching wood furniture can yield beautiful results, there are some common mistakes that you should avoid:
- Overbleaching: Leaving the bleach on wood for too much time can lead to it becoming overly bleached, making the wood too light or causing harm. It is important to stick with the suggested duration for bleaching and regularly inspect the color change.
- Not Neutralizing the Bleach: If you do not stop the bleach’s action with a water and vinegar mix after getting the color you want, it might keep bleaching and could harm the wood.
- Skipping the Sanding Step: Not sanding the wood before and after you bleach is important to avoid if you want the surface smooth and uniform. If you don’t do this step, the outcome may be uneven or not soft.
- Not Testing the Bleach: Always try the bleach on a little part first before putting it all over the furniture. This way, you can see what the bleach does and not have unexpected results.
Conclusion

Bleaching wood furniture can give old items a new appearance and create a clean starting point for personal creative touches. If you follow the instructions in this article, you will be able to produce an attractive bleached finish that improves how your furniture looks. Make sure to select the correct bleach variety, get the wood ready correctly, and always be careful about safety while working. If you are patient and pay close attention to small details, you can turn your wooden furniture into a beautiful main feature that brings beauty and personality to your room.